Sunday, March 13, 2016

Cookie Moon Phase Project

Pin It Now!


In light of publishing my first children's book about the moon, I decided to update our delicious moon phase project made with cookies. I can't believe it's been 4 years since my sweet girl and I had so much fun with astronomy. :) To view original post, click the link. (Picture below is from original post.)


Updated Cookie Moon Phase Project


What I Used:

  • For moons: 8 Oreos or other type of chocolate sandwich cookies with white cream filling
  • For the earth: Sugar cookie that is larger than moon cookies
  • Plate
  • Frosting (I used powdered sugar and milk to make mine)
  • Food coloring
  • butter knife
  • toothpick
  • black construction paper and silver sharpie, optional

What I did:

First, I chose my plate and then cut a circle out of a black piece of construction paper to fit the plate. I wanted the background to look more like the sky in space. I also used a silver sharpie to dot stars all over the paper. You could use a little bit of icing on the plate if you want the construction paper to stick. A black paper plate would work nicely if you have one.

Second, I whipped up a little bit of white frosting with powdered sugar and milk and left it somewhat thin, but not too thin. I colored some of it blue and some of it green, and I also left a little bit white for clouds. You don't need a lot of frosting since you are only using it for one cookie. After frosting the cookie blue, I used a regular butter knife to dab in the land masses. I wasn't trying to be entirely accurate here. ;) I used a toothpick to swipe in some clouds. 

(I used plain, old sugar cookies from Fry's)

(Icing - nothing fancy, just powdered sugar and milk)

Third, I set aside the earth cookie to dry and moved on to the moons. I very carefully took 8 Oreo cookies apart, trying to leave the white filling intact. I had to use more than 8 cookies to accomplish this. ;) For the full moon, leave white filling as is. For the new moon, scrape off all of the white filling with a knife or use the other side of the cookie. For the 2 half moons, scrape off half of the white filling. For the 2 crescent moons, scrape off 3/4 of the white filling, and try to make them look more like bananas. :) For the 2 gibbous moons, scrape off about 1/4 of the white filling, and really, these should have more rounded edges. I sort of forgot that part on my updated version. :(

Fourth, I put the earth in the middle of the plate and placed the 8 moons, in the correct order, around the earth. Use frosting if you want the cookies to stick to the plate. I did this step the first time my daughter and I completed this project. Leave the project out for a few days to enjoy looking at it, or EAT IT instead!!! Eating is definitely more fun. :)


Your Turn:

Download my book, Mysterious Moon, and then make this delicious moon phase project!! I would love to see all of your creations! Please feel free to email me pictures of your own moon phase projects at brandiraae at live dot com, and I will post them on my blog. :) Include your name and where you are from if you want to, or you can remain anonymous. Remember to be creative - you don't have to do yours exactly the same. You could use a cupcake or doughnut for the earth, or you could even draw or paint it like my daughter did the first time we made ours. 


Linked to Mommy Monday Blog Hop, Hip Homeschool Hop, WFMW, Try A New Recipe Tuesday, Tuesdays with a Twist, Inspire Me Monday, Mix It Up Monday, Tell It To Me Tuesdays, A Little Bird Told Me, Tasty Tuesdays


affiliate link included in this post

Wednesday, March 02, 2016

February ~ A Month of Firsts!

Pin It Now!
We experienced lots of firsts this month. By the first of February, we were able to say GOODBYE to our 3 1/2 year renting phase of life - yay!!! Unfortunately, for the first time I experienced moving with the flu. I was so miserable. :( So glad to feel great again!

First time to live in a neighborhood with a golf course. Didn't think I'd like it too much, but I'm loving all the trails and how hubby and I are walking together on a consistent basis. I think we're averaging about 18 miles per week. Feels so good. I definitely have more energy and feel better overall.


First time to FINALLY have white cabinets, and they're all throughout the house!! I've wanted white cabinets for my entire marriage, but the curse of orange oak seemed to follow me wherever I went. Even though I definitely have less cabinet space, at least the cabinets are white. :) It's also the first house in which I've ever had granite counter tops. Ooooh, feeling middle class fancy for sure!!


Less cabinet space led to my first ever china cabinet thanks to my sweet hubby. Even though the extra storage space was more of a "need" I still wanted it to look nice. I LOVE the way it turned out, and I only used items that didn't fit in my cabinets. For the first time, I have somewhere to display my milk glass which was passed on to me from my mom which used to be my grandma's. I wish my grandma were still here so she could see it displayed in my home.


First time to see 5 planets in the sky right along side the moon. It was really neat! Too bad Mercury, Mars, and Saturn wouldn't show up on my phone camera. Only Jupiter and Venus were bright enough and close enough, I guess.


First time to hike the San Tan Mountain even though I've lived SO close to it for 9 years.


First Valentine's Day in our new home.


And last but not least, on February 23, 2016 I published my first children's book, Mysterious Moon!! Though it isn't my first manuscript, it is my first published book - click on the link to download it from Amazon. :) Thanks!


Now, I'm looking forward to March and turning 40 - yikes!

This post contains amazon affiliate links. 

Sunday, February 28, 2016

Chocolate Crinkle Cookies

Pin It Now!


These are some of my favorite cookies to make, especially when my chocolate snack stash is all gone! If baked just right, they're oh so soft and perfectly chocolaty on the inside. :)

What You'll Need:

3 eggs
1 1/2 cups white, granulated sugar
4 ounces unsweetened chocolate, melted (I just buy those unsweetened baking squares)
1/2 cup coconut oil, melted (I use unrefined)
2 tsp baking powder
2 tsp vanilla (For best taste, don't use imitation vanilla)
2 cups all-purpose flour (I like to use King Arthur flour for my baking)
Powdered sugar (about 1 cup or more)

What You'll Do:

1. In a mixing bowl, beat eggs, granulated sugar, melted chocolate, melted coconut oil, baking powder, and vanilla with an electric mixer until combined. Beat in as much flour as you can, then stir in any remaining flour. (I like to stir flour first, so it doesn't blow all over the place when I start mixing!) You can cover and chill for 1-2 hours if you wish, however, I do not do this. I move on to the next phase right away . . .

2. Shape dough into 1-1 1/2 inch balls. Roll cookie dough balls in powdered sugar to coat generously. (I pour about 1 cup of powdered sugar into a cereal-sized bowl to do this step, but I don't really measure. Add more if needed.) Place cookie balls about 1 inch apart on ungreased cookie sheet (I line mine with foil). Bake at 375° for 8 minutes. Adjust time depending on oven. DO NOT over cook. Cookies should have crackles on top but still look a little bit doughy. Let sit on cookie sheet for just a minute and then transfer to a wire rack. Store in airtight container or on plate wrapped tightly in saran wrap. Makes between 30 and 40 cookies, depending on size. If you like them bigger, you may need to cook a tad bit longer.

Tips:

1. Make sure coconut oil is thoroughly melted. Stir in first before beating so it doesn't splatter everywhere. Since coconut oil begins to solidify at about 76° F, don't let it sit in bowl for any length of time. I add the oil right before beating the mixture the first time. (Before the adding flour step.)

2. I personally don't let the cookies cool entirely before storing. This keeps them soft the next day. In fact, they taste better the next day!

3. Lining cookie sheets is important because the stray powdered sugar that gets on the cookie sheet turns liquidy during cooking and likes to stick to the pan. I prefer less mess. :)

4. If you don't have 4 oz. unsweetened baking squares on hand, you can substitute 12 tablespoons of cocoa powder and 4 tablespoons melted coconut oil mixed together. I've had to do this a couple of times, and the cookies turn out just fine. In fact, that's what I had to do this last time! ;)

Enjoy!!

Linked to Try A New Recipe Tuesday, Works for Me Wednesday, Tasty Tuesdays

***Excited to share my first published children's story ~ Mysterious Moon! Download on Amazon today. :)

Tuesday, February 09, 2016

Pattern of Love True + Free Printables

Pin It Now!


I love Valentine's Day. I love celebrating the ones I love. I love eating CANDY in colors red & pink! I love making this Taco Heart Ring for dinner every year! Most of all, though, I love focusing on what LOVE TRUE really is.

As Valentine's Day approaches, let us be sober minded about what true love is. As Christians we know that a true love model CANNOT be found in the pattern of this world. Just like the devil can appear as an angel of light, there are many things in this world that can appear as love but are anything but. And vice versa is true as well. For instance, disciplining a child, though it involves discomfort, is far more loving than spoiling which, for the moment, provides much pleasure. Pleasure and warm, fuzzy feelings don't necessarily = love.

The Bible is really the ONLY place we can go to find a pattern for a love that's true. And that's because it's the ONLY place where we meet the One who not only created love but IS love. :)

Pattern of Love True according to 1st John chapters 4-5:

Love comes from God.

God is love.

God showed his love toward us by sending his Son as an atoning sacrifice for our sins.

We can love God because He first loved us.

We show our love for God by keeping His commands.

If we love God, we must love others.

Be sure to read 1st John chapters 4-5 this Valentine's Day! Also, feel free to print these 10 True Love Bible Verses. I'll be reading through these with my kids on Valentine's Day. :)


Click here to print these verses.


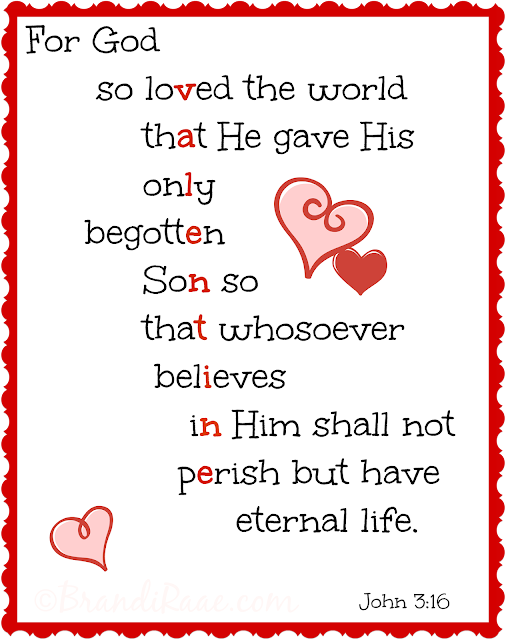
Bonus: here's a free For God So Loved the World printable I made a couple of years ago. Follow this link to print if you wish.

Valentine Printable

Linked to WFMW


Wednesday, December 09, 2015

Entertain Kids with Cinnamon Toast Crunch Movie Maker

Pin It Now!


*Updated - original post 10/20/2010


Cinnamon Toast Crunch isn't a cereal I let my kids eat for breakfast (more for dessert), but they sure had fun with the Cinnamon Toast Crunch Movie Maker!!

I can't believe it's been 5 years since my boys had fun making silly movies with animated Cinnamon Toast Crunch squares. Today, my daughter saw the title of my old post and wanted to know what it was. I clicked on my link and was surprised that it still worked. So, now she's had fun making some silly movies.

I think your kids will have fun making Cinnamon Toast Crunch movies, too. :) They are super simple to make, so even little ones who know how to click can do it. :)

There are also games and videos for your kids to enjoy. Finding good, on-line entertainment works for me!!!


Linked to WFMW, Hip Homeschool Hop

Images are screenshots from the website. (Hopefully I'm not breaking any rules by using them. Just wanted to share the fun!)


LinkWithin

Related Posts Plugin for WordPress, Blogger...