Wednesday, July 31, 2013

BrainFood Learning: Fascinating World of Insects DVD {Schoolhouse Crew Review}

Pin It Now!

 photo 31477_411332758959489_253604783_n_zps2cd64016.png 

Sometimes it's nice to let someone else do the teaching. That's why I LOVE opportunities to review DVDs! BrainFood Learning sent members of the Schoolhouse Review Crew three of their science DVDs: Fascinating World of Birds, Fascinating World of Insects, and Fascinating World of Mammals.
 
Our family watched the Fascinating World of Insects DVD.

Here's a preview . . . 


I don't know about you, but just like the preview mentioned, not a day goes by that I don't come across some type of insect. They're definitely worth learning about since they really are EVERYWHERE! Most of the time I view the little six-legged creatures as a nuisance, but I know they're quite beneficial, too. I sure am thankful for all of the bees buzzing around in my backyard - I do love honey and flowers.

In this visually stimulating DVD about insects, kids of all ages can watch striking insect videos and learn basic insect facts. There are quite a few really interesting details about specific insects, too. Some of the information was even new to me!

 photo insects_front_500__981921320383955300400_zps866e5588.jpg Eleven featured insects are plainly identified and revealed in their natural surroundings, and they include:

1. Grasshopper - Did you know that there are 18,000 different species of this insect? That's a lot of grasshoppers! You will also learn how far the grasshopper can jump and what it does when it feels threatened. (It's kind of gross!)

2. Lady Bug - Did you know that these insects taste bad? Well, I hope not. :) You will also learn why these insects are so beneficial and that they come in a variety of colors, even one color you may have never seen on a lady bug.

3. Rhino Beetle - Did you know that this is one of the strongest creatures on earth? You will also learn what their horns are used for, how long they live, and if you should be scared of these frightening-looking insects.

4. Firefly - Did you know that these insects only glow in certain parts of the United States? I found that really interesting, but you'll have to watch the video to find out if they glow where you live! You will also learn how long they live, why they use their light, and if it's hot or not.

5. Mosquito - Did you know that only females suck your blood? You will also learn how mosquitoes find you and why their buzz is so irritatingly loud!

6. Honey Bee -  Did you know that nectar is turned into honey inside a bee's stomach? You will also learn how bees gather nectar and pollen and how they build their hives.

7. Water Strider - Did you know that these insects have really good vision? You will also learn how they float in the water and what keeps them from getting wet.

8. Ant - Did you know that ants have two stomachs? Learn why by watching the video! You will also learn how strong they are, what their antennae are used for, and how they work together.

9. Praying Mantis - Did you know that there are 20 species in North America? You will also learn why they are beneficial and what makes their heads so unique.

10. Dragonfly - Did you know that these insects can hover in place, fly forward, fly backward, and fly sideways? That's talent! You will also learn just how fast they can fly and what insect is their favorite snack.

11. Butterfly - Did you know that a butterfly's front wings and rear wings are hooked together? You will also learn about the butterfly's stages of growth and metamorphosis.

Throughout the video, vocabulary words in bold, orange letters appear on the screen and are defined by a child's voice. Words appear as they are introduced in the video, and they are as follows:

  • Entomologist
  • Species
  • Elytra
  • Larva
  • Scientific Name
  • Proboscis
  • Pollination
  • Adaptation
  • Colony
  • Predator
  • Wingspan
  • Metamorphosis

At the end of the video, there is a Five Part Review which progresses from easy to difficult.

     1. Insect Flash Cards: This is a review of each insect studied in the video. You see a picture of the insect and its name on the screen, and you hear its name spoken aloud.

     2. Review Your Insects: A picture of an insect appears on the screen with multiple choice answers from which to choose.

     3. Parts of an Insect: The video reviews the parts of insect with a labeled picture on the screen.

     4. Review Insect Facts: There are 11 questions (1 for each insect learned) and multiple choice answers from which to choose.

     5. Review the Big Words: There are 12 multiple choice questions which review all of the vocabulary words learned throughout the video.

The video is approximately 43 minutes long, and although it is appropriate for all ages, I personally feel that it is geared mostly toward children in elementary school. If your children are in 7th grade and up, I think they would need something a little more challenging unless they've never studied insects before. Even though my sixth grade son and ninth grade son watched along with my daughter (third grade) and me, they both knew most of the information already, except for maybe a few interesting facts. They knew all of the basic stuff, though. With that said, it was still an engaging video for the whole family to enjoy.

My daughter benefitted the most from watching the video, and I believe she even got all of the Five Part Review answers right! Younger children, even preschoolers, would probably enjoy the video, too. Be aware that they might not be ready for parts 4 and 5 in the review section.

The Fascinating World of Insects will be a great addition to your educational DVD collection. You can purchase this DVD on the website for $14.99. (Shipping is calculated at checkout.)


Photobucket
 
 
 photo Disclaimer2_zpsff718028.gif

Monday, July 29, 2013

There's a New Soda Song in the Making . . .

Pin It Now!
So, out of all the comments on facebook and my blog for Lincoln's Soda Song Challenge, he had 4 sodas from which to choose that weren't already part of his soda song collection: A&W Cream Soda, Strawberry Fanta, Jones Cola, and Squirt.

He designed an image to announce his choice . . .


Stay tuned as he will be working on the new song this week. :) I will post it as soon as he releases his new soda hit!

Legacy of Laura Ingalls Wilder DVD {Schoolhouse Crew Review}

Pin It Now!
 photo legacydocumentaries_zps0971e3df.jpg
 
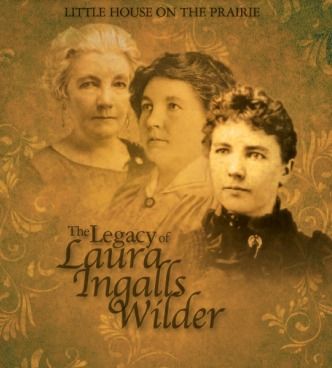
Legacy Documentaries offered members of the Schoolhouse Review Crew one of two documentaries to review - Little House on the Prairie: The Legacy of Laura Ingalls Wilder and Almanzo Wilder: Life Before Laura, both of which have been produced by Dean Butler who played Almanzo Wilder on the Little House TV series. Our family had the privilege of watching Little House on the Prairie: The Legacy of Laura Ingalls Wilder. 
 
I confess: I've never read the Little House on the Prairie novels, but I did grow up watching the TV show. Except for one children's picture book that our family owns, A Little Prairie House adapted from the Little House books, my own children really don't know much about Laura Ingalls Wilder or her Little House on the Prairie. Kind of sad considering they've watched other classic shows from the past like Andy Griffith, Father Knows Best, and currently Bonanza. (It's mostly my middle son who's on a Bonanza streak.)
 
 photo legacyoflauraingallswilder_zpsafffba0c.jpgEvery time I mention, "What about Little House on the Prairie?" I'm met with half-hearted grunts and shrugging shoulders. Maybe my boys think the show sounds too girlie, and maybe my daughter's just too young and unknowledgeable to have a preference. I'm really not sure, but my hope was that by watching this DVD, it might spark some interest. Since my hubby and I love to watch interesting documentaries, we made a Friday night of it and munched on fun snacks while watching the DVD as a family.

Whether you're a die-hard or casual Little House on the Prairie fan, you are in for a real treat when you watch The Legacy of Laura Ingalls Wilder, a documentary about a woman who truly defined and illuminated the American experience. For one hour, through impressive cinematography, original paintings from frontier artists Harvey Dunn and Charles Russell, reenactments, and  a pleasant musical score, you will be transported to the real world of Laura experiencing for yourself "the places she lived, the people she loved, and the past she brought to life."


Much of the documentary focuses on Laura's life as a writer and the many tragedies she endured as an adult. Though she experienced much hardship, she seemed to greet life with a positive attitude and felt that hard work and sacrifice could make the best of things.

For some reason, I'd always thought that Laura's stories and later the TV show were based upon journals that she'd kept as a child during her family's travels in a covered wagon. Well, that's simply not true. I learned that she didn't begin keeping a journal until much later when she and her husband, Almanzo, moved to Mansfield, Missouri in 1894, and that she eventually became an intentional author.

I also learned a lot of other interesting facts about her journey to becoming an author. Did you know it all started (if you don't count keeping a journal) with a speech she wrote about raising excellent egg-laying chickens? She eventually found herself writing a column for a newspaper and then novels for publishers for which she is so well known. Her novels made her popular and are still enjoyed today because they speak of courage, hope, and love - universal themes to which we can all relate, and tell "what life was like and what it could be like."

By watching the documentary, you can find out all of the juicy details surrounding each and every novel she wrote. You will also discover that her journey as an author wasn't always a bed of roses due to many ups and downs, disappointments, and relationship struggles with her daughter and editor, Rose Wilder.

Our whole family enjoyed watching Little House on the Prairie: The Legacy of Laura Ingalls Wilder. Even my 8-year-old daughter sat through it, but if I had to suggest an appropriate age level, I'd say it is best for ages 10 and up. In my experience, most young elementary kids aren't super jazzed about watching documentaries.

This quality DVD is great for homeschoolers, collectors, and anyone who has been touched by Laura's Little House on the Prairie stories. In addition to the documentary, the DVD features a few extras: Director's Diary (the making of the documentary), Almanzo Wilder: Life Before Laura Trailer, and Pa's Fiddle: The Music of America Trailer. Add this treasure to your DVD collection for $24.95.

I can certainly tell you that my daughter can expect her next mama/daughter read-aloud to be Little House in the Big Woods! Which Little House books have you read?


Photobucket
 
 
 photo Disclaimer2_zpsff718028.gif

Wednesday, July 24, 2013

There Must Be Something in the Water

Pin It Now!

About a week ago, my hubby came home from spending a week in Tennessee at the river with his dad and siblings. He's been doing this for the past few years now, and I am used to maybe getting some flowers upon his return. But a new lap top and 20 lbs. of grass-fed beef, too?

For real, he came home with a beautiful bouquet, and then he announced that he'd ordered me my very own lap top. And then, he started talking about farmer's markets and grass-fed beef. Seriously.

Um, somethin' must've been in that river water, cuz I was like, whoa! I had to check and make sure the right husband had just walked through my door. ;)


A week later, these flowers are still sitting in the center of my table. Some are starting to get a little droopy, but I don't think I could ever tire of receiving fresh flowers from my hubby!


Even though it's been somewhat frustrating learning how to get around in Windows 8, I am feeling extremely blessed to have my very own computer! It was becoming more and more difficult trying to share one computer with 5 people. Since the kids are getting older, they are using it so much more - for school, games, music, etc. It's even white to match my Windows phone. :)

 
Wow, and the whole grass-fed beef thing was quite a shock. I'd talked a while back about how I'd love to be able to buy this kind of meat, but it was just way too expensive for me to fit into the food budget. I've even cut back on buying raw milk because of the expense.
 
So, our weekend date was to Superstition Ranch Market where we bought lots of fruits and veggies for super cheap. Even bought three kinds of produce I'd never had before: golden honey dew, lemon drop melon, and rainier cherries. And then we went to a farmer's market in Gilbert where Double Check Ranch sells their meat. And my hubby bought some for me. :)
 
Thanks, Babe, for spoiling me last weekend. I love you! I'm looking forward to our healthy smoothie date this weekend . . .

Tuesday, July 23, 2013

S is for Soda Song Challenge!

Pin It Now!


Last week my son, Lincoln, shared a few root beer tips and a root beer song with you all. Well, he's actually created an entire silly soda song collection including: (Scroll down for the challenge.)

Mountain Dew


Coca Cola


Sprite


Dr. Pepper  (Lyrics by Lincoln & music by Cornflakez)


Here's the challenge: Tell us what your favorite soda is and Rootbeer Fanatic will choose one and make a new soda song!

  • If your favorite soda is already listed above, then please visit www.soundcloud.com/rootbeer_fanatic and like and share your favorite soda song.
  • If your favorite soda is not listed above, then leave a comment telling Rootbeer Fanatic what your favorite soda is. We will announce the new soda song title next Monday, July 28, 2013 which happens to be our first day of school. :)


Have a fantastic week, and enjoy listening to these crazy songs about soda!! Oh, and don't forget to check out all of the other S posts at Ben and Me.

Blogging Through the Alphabet

Strawberry Mango Lemonade Smoothie

Pin It Now!
I know, another smoothie recipe. We've been making a lot of them lately. Blueberry Pomegranate is on the menu this week, but last week we made 2 different mango smoothies that were very delicious!


Ingredients
  • 1 cup frozen strawberries
  • 1 mango, chopped
  • 1 cup of vanilla yogurt ( we used the regular not low fat Mountain High brand)
  • Santa Cruz Mango Lemonade
  • Ice Cubes 

Directions
  • Add fruit and yogurt to blender. 
  • Fill blender up to the number 5 with Mango Lemonade. (If your blender doesn't have number of cups listed, then I'd say you need about 4 cups of liquid.) 
  • Blend until smooth. 
  • Add ice if needed. I wait until the end to see if I need to add ice to thicken. For this smoothie, I added 6 ice cubes to achieve desired consistency.
*To see pictures of the steps and the type of juice used, click the Berry Lemonade Smoothie link.
 
**For a Banana Mango Lemonade Smoothie, instead of 1 cup of frozen strawberries, add 2 frozen bananas, chopped.

Both were super yummy. :)

Linking up with Try a New Recipe Tuesday, Works for Me Wednesday

Saturday, July 20, 2013

How to Hang a Puzzle on Your Wall (without a frame)

Pin It Now!

This post is no longer available on Blogger. Please visit my new site to view How to Hang a Puzzle on Your Wall (without a frame).


Wednesday, July 17, 2013

R is for Rootbeer Fanatic's Root Beer Tips

Pin It Now!

Um, my middle son really likes root beer in case you didn't notice. ;) Today, he wants to share 4 tips and a song with all of you!


Grab your kids and listen to this fun song created by my son, Lincoln. Stay tuned next week for a Soda Song Challenge in which he will need your help!


Thanks for listening. :)

Blogging Through the Alphabet Linking up with Ben and Me - Blogging through the alphabet.

Tuesday, July 16, 2013

Berry Lemonade Smoothie

Pin It Now!
Three out of four seasons in the AZ desert, I make smoothies. While I don't make them everyday, I guess I make them often enough for my kids to encourage me to open up a smoothie shop. Doing that doesn't appeal to me in the least, but the fact that my kids think my smoothies are THAT good makes me feel pretty special in a motherly/homemaking sort of way!! My kids can be so sweet sometimes. :)


While I whipped up this smoothie the other day, my daughter rushed upstairs to grab a piece of paper so she could write down all the ingredients. I'd say we're a great smoothie-making team!

Berry Lemonade Smoothie

Ingredients

  • 1 banana (frozen is best)
  • 2 cups frozen berries (we used strawberries, raspberries, and blueberries)
  • 1 cup of vanilla yogurt ( we used the regular not low fat Mountain High brand)
  • Santa Cruz Strawberry Lemonade
  • Ice Cubes 

Directions
  • Add fruit and yogurt to blender. 
  • Fill blender up to the number 5 with Strawberry Lemonade. (If your blender doesn't have number of cups listed, then I'd say you need about 4 cups of liquid.) 
  • Blend until smooth. 
  • Add ice if needed. I wait until the end to see if I need to add ice to thicken. For this smoothie, I added 6 ice cubes to achieve desired consistency.


*All of my kids approved the Berry Lemonade smoothie! Oh, and I did, too. :)

**I am including this recipe as part of the Schoolhouse Review Crew Blog Cruise: Too Hot to Cook Recipes - hop on over and see what other members are "not" cooking!


Also linked to: Tasty Tuesday, Try a New Recipe Tuesday, Works for Me Wednesday

Monday, July 15, 2013

Ed Douglas Publications: 25 Truths {Schoolhouse Crew Review}

Pin It Now!


 photo 25_zps13016d40.jpg 


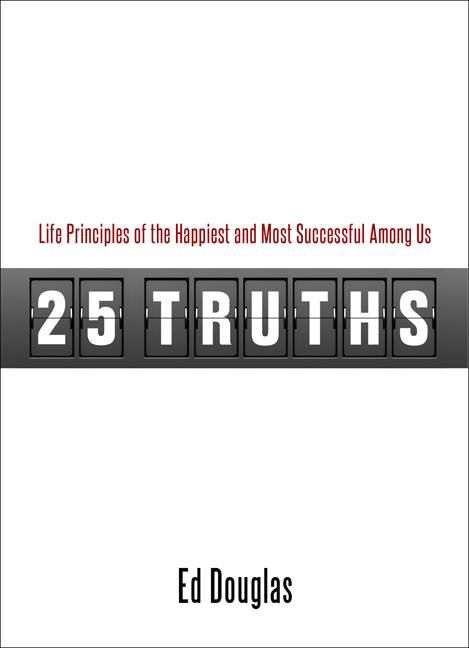
For my latest Schoolhouse Crew review, Ed Douglas Publications sent me 25 Truths: Life Principles of the Happiest Among Us.


 photo 25book_zpsac9dca24.jpg

About the Author

Ed Douglas is a certified financial planner and currently runs Ed Douglas Certified Financial Planning/Consulting. Before that, he spent almost 32 years with Citizens Bancshares Bank located in Chillicothe, Missouri. During his last 20 years there, he served as president and later chairman and CEO. Besides 25 Truths, Ed has authored Making a Million with Only $2000: Every Young Person Can Do It, and The Money Marathon: 7 Simple Steps to Financial Freedom.

Ed is also a husband, father, tennis coach, and marathon runner. He's an active member of his church, and he currently acts as president of the Chillicothe Education Foundation and serves on the William Jewell College Board. Be sure to check out all of his accomplishments and more on the website!

About the Book

What began as Ed Douglas's personal, three-page list titled "Life's Truths" or "25 Tips for an Enjoyable Life" that he routinely shared with friends, family, acquaintances, and students, is now a 150-page motivational guide written to help others live life to the fullest. It's great for individuals, families, Bible study groups, etc. Books like this one which encourage people to live ethical, honorable lives are definitely needed in our current culture of rapidly declining standards.

Of course these 25 truths aren't meant to be a substitute for Biblical wisdom, however, they are based upon Christian principles centering on morals, values, character, positive thinking, and perseverance. There's even a prayer of salvation included at the end of the book to give non-believers the opportunity to pray and receive Christ as their Savior.

Each truth in the book begins a new chapter and is immediately followed by an inspirational quote or Bible verse. Truths are briefly explained and reinforced by personal stories from Ed's own life. He often shares stories from other people's lives as well.


After each truth is identified and explained, there is a one-sentence summary to recap the heart of the truth. Following that is the Workshop. This is where you learn how to apply the truth to your own life by answering 5 questions. The first question after each truth asks, "Do you think this is an important truth? Why or why not?" The last question after each truth basically asks how you can implement the truth in your own life and what steps you can take in order to achieve success. The in-between questions deal with thinking about times in your life when you did or didn't model the particular truth or people in your life who do or don't model the particular truth and how it makes you feel. All of these questions really make you think about what you can do to truly live a better life and make a positive difference in the world.

Included at the very end is a bonus truth. The most important one of all, actually. Without it, the truths simply won't work. You probably already have a good idea of what it is, but I will let you read the book to find out for yourself!

Opinion

While I've only read the book for myself so far, I plan on reading it aloud to my kids and discussing each truth in detail. (Best for older elementary children and up.) I think 25 Truths will make a great Bible study tool to kick off our school year in just a few short weeks! I am going to add one more task to the Workshop portion, though: find and write down more Bible verses that support/reinforce each truth.

While I think it would be feasible to cover one truth per day, I may stay on one truth for several days to let each one really sink in. I'm really looking forward to hearing my children's thoughts during our discussions!

I did find several typos toward the end of the book, but they didn't take away from the message in any way. I still recommend it, and I hope this book will be as much of a blessing to you as it has been to me. You can order your copy for $12.50 plus $3.00 shipping and handling.


Photobucket
 photo Disclaimer2_zpsff718028.gif


Thursday, July 11, 2013

Q is for Quilt Made Out of Baby Clothes

Pin It Now!

This absolutely has to be one of my most prized possessions! Now that the quilt is finished, I proudly display it at the end of my bed. :) I first wrote about this quilt when it was in the making, however, the post is not a tutorial or anything.

Tip#1: Even if you don't know how to quilt, save your baby's clothes, blankets, and/or bedding. (You may be able to find someone who can make it for you ~ that's what I did.)

Unfortunately, I didn't save very many baby clothes that my oldest child wore. I wasn't thinking, "Hey, maybe you should save these for a future quilt." I saved a few more baby clothes that my second born wore (both boys so far), but by the time I had my third child (girl), I knew I wanted to save the clothes in order to have a quilt made for me to cherish until the day I die!

Since I didn't have very many clothes from both of my boys, I used their nursery bedding and a couple of blankets to make quite a few of the squares. I had way more clothes than I needed to make squares of  my daughter's clothes!


Honestly, I have no idea how the thought came to me, especially since I knew (and still know) nothing about quilting. I prayed for God to help me find someone I could trust with all my baby clothes. I had no idea how difficult it would be to find someone to do this for me!

Well, in 2009, four years after my third child was born, God answered my prayers in the form of a dear friend who moved to AZ from CO. She cut out all the squares, sewed all of them together, helped me pick out fabric for the back and edges, and then sewed all of that together, too! AMAZING!!!

Recently, another dear friend who moved here from CA finished the quilt by stitching the batting and fabric together. This quilt is so precious to me and definitely a true labor of love! I can never thank these two ladies enough.


Tip#2: Save some of your children's clothes throughout their lives in order to have quilts made for each child when they leave the house.

I have a couple of tubs of my kids' clothes that I am saving and adding to each year in order to be able to do this. I still don't know how to quilt, so I am hoping I will again find someone to do it for me. Or, maybe by then I will have the time to learn how to quilt on my own?!

I promise that quilts made of all your kids' clothes will be TREASURES!!!

Join Ben and me for more Q's . . .
Blogging Through the Alphabet

Tuesday, July 09, 2013

Five Days of Fairy Food: Fluffer Nutter Flower Sandwiches

Pin It Now!


Fluffer Nutter sandwiches are quite nostalgic for me, but until my daughter's "fairy" sleepover, I'd never made them for any of my kids. I remember my mom packing these sandwiches in my lunchbox in elementary school. I liked Fluffer Nutter days; they sure beat margarine and bologna days! I knew it must be time to go grocery shopping when I got those. Bleh.

There's a reason I don't make Fluffer Nutter sandwiches for my kids ~ they fly in the face of healthy eating. I am not even sure that the white filling can even in good conscience be called food. But, since this was a special sleepover, I made them. White, fluffy filling just seemed fairy-ish. Plus, party food's not supposed to be healthy, right?


Anyway, for the sake of a fairy party, you might want to include these on your menu. :)

Fluffer Nutter Flower Sandwiches

Here's what you need to make them:

  • Almond Butter, Sun Butter, or Peanut Butter {My mom's original ones were made with peanut butter, but we can't use that in our house - I used Almond butter for mine.}
  • Marshmallow Cream {I admit, I had a leftover jar in the pantry from making fudge at Christmastime.}
  • Bread
  • Flower-shaped cookie cutter

And that's a wrap for Five Days of Fairy Food! Here are some photos of the girls enjoying their fairy sleepover.


And, of course, they had to play in the fairy garden for a minute. :)

In case you missed the other posts in this series:

Day 1: Pixie Popcorn
Day 2: Frosty Fairy Mints
Day 3: Flowers & Butterflies
Day 4: Toadstool Salad

*Linking up with Try a New Recipe Tuesday and Works for Me Wednesday.

Monday, July 08, 2013

Lilla Rose Flexi Clip ~ Review

Pin It Now!


I was super excited when Jennifer contacted me about using and reviewing a Lilla Rose Flexi Hair Clip! I'd heard about Lilla Rose through other ladies' blogs, and I remember thinking about how pretty all the hair clips were. I just never got around to checking them out for myself; plus I've always had a difficult time finding clips and such that actually stay in my hair.

Lilla Rose sells unique, beautiful hair jewelry that is truly functional. Their signature hair accessory, the Flexi Hair Clip, is a versatile clip which enables you to wear your hair in a variety of styles. It's really lightweight yet holds your hair in place.

The hardest part about this review was picking out a hair clip! There are SO many pretty ones from which to choose. I finally decided on the flower blossom medley Flexi Hair Clip. (Retail $13)


What Size?

Before you begin looking for the perfect design, you will want to know which size will work best for your hair type. You can find out by viewing a sizing chart and watching a brief Flexi hair clip sizing video. Because I was not blessed with thick, luscious locks, I had to go with the extra small for ponytails and for the french twist. (Pictured above) I would need to have a mini clip to wear my hair in a half-up ponytail.

Sizes offered are: mini, extra small, small, medium, large, extra large, and mega.

My Opinion

It was very easy to use the Flexi clip for a ponytail, however, I did need to watch the styling videos to be able to use it for wearing my hair up. It took me a few attempts to get it just right, but now that I've had practice, it's pretty easy to do. Sometimes if I don't get enough hair in the clip, my up do will eventually sag just a tad, but it's never fallen out or anything. I definitely wear my hair up more in the summertime since it is so unbelievably hot in the Arizona desert! I feel that wearing the clip instead of elastic bands is less damaging to my hair. Prettier, too. :)

It did take some time for me to get used to the fact that the clip doesn't feel tight while I am wearing a ponytail. It was more difficult at first to achieve the "bump look" without elastic bands. And I do need a slight bump; makes my hair look a little thicker. Well, at least I think it does. ;) I am wondering if the mini clip would even be better for my ponytails?

Overall, I really like the Lilla Rose Flexi Hair Clip, especially for wearing my hair up. I'd love to try their other hair accessories as well. They have Hair Sticks, Orings, Hairbands, Bobby Pins, and You-Pins. All of these would make such great birthday or Christmas gifts for all of the girls on your list. They'd make cute stocking stuffers, too. Be sure to check out Jennifer's website to see all of these beautiful items! Thank you, Jennifer, for the opportunity to try the Lilla Rose Flexi Hair Clip!

----------------------------------------------------------------------------------

Follow Jennifer's Pretty Hair on Pinterest and Facebook! Seeing all the beautiful hair styles really makes me sad that I don't have thick hair, though. :( Maybe my daughter will let me try out some new styles on her.
 
Also, if you are interested in a business opportunity, you can learn all about joining the company by clicking the link.


Five Days of Fairy Food: Toadstool Salad

Pin It Now!

Today, I am featuring the healthiest of the fairy foods. :)


Ingredients

  • Shredded lettuce - I used iceberg
  • Boiled eggs
  • Roma tomato end slices
  • Raspberries
  • White Cheese sticks cut up into 1/2" - 1" chunks
Directions

Arrange shredded lettuce on a plate. Top the lettuce with whole, boiled eggs and cheese chunks. (May need to slice the bottom ends of eggs so they will stand up better.) Slice tomato ends and scoop out any remaining flesh. Put tomato ends on top of the eggs. Add raspberries to the tops of the cheese chunks. And there you have your Toadstool Salad!!


Other posts in the Five Days of Fairy Food series:


Sunday, July 07, 2013

Five Days of Fairy Food: Flowers & Butterflies

Pin It Now!

Today, I am sharing how to make flowers (and a butterfly) with food.


What you need:
  • Flower centers
  • Flower petals
  • Flower stems/leaves
Of course, the possibilities are endless, but I will share what we used. (Not all food items and flowers are pictured here.)

Flower Centers
  • Strawberry slices
  • Boiled egg slices
  • Baby carrot slices
  • Banana slices
  • Cucumber slices
Flower Petals
  • Grape slices - the flame kind, they're longer
  • Strawberry slices - sliced the long way
  • Orange slices sliced in half
  • almonds
Flower Stems/Leaves
  • Green onions - wanted to keep it simple :)
The butterfly was kind of an afterthought. I used leftover food - bottom of green onion for the body, strawberry end slices for wings, and green onion tips for the antennae.


Other posts in the Five Days of Fairy Food series:

Saturday, July 06, 2013

Five Days of Fairy Food: Frosty Fairy Mints

Pin It Now!

Today, I am featuring Frosty Fairy Mints (from Barbara Beery's Fairies Cookbook). To see yesterday's post, Pixie Popcorn, click the link.


Frosty Fairy Mints

Ingredients

1 3-ounce package cream cheese

2 1/2 cups powdered sugar

1/2 tsp. mint extract (I use a couple of drops of YL peppermint essential oil)

Assorted pastel food coloring

1/2 cup sugar

Directions

Mix softened cream cheese and powdered sugar with an electric mixer. Add mint extract to dough. Knead dough until it begins to form a ball and is the consistency of pie dough. If dough is too dry, add 1/4 tsp. water and blend into mixture.

Divide dough into 3 equal pieces and put 2-3 drops of food coloring onto each section. Blend colors into each portion. You can leave colors swirled or completely blend evenly.

Pinch off about a 2-inch piece of dough and form a ball by rolling between palms. Roll ball in sugar. Flatten out dough and cut into assorted shapes with a small cookie cutter.

***This is the recipe I copied from my other frosty fairy mints blog post. To see the original mints, click on the previous link. For these mints, I used sparkly, colored sugar and less food coloring.


*Affiliate link included in this post. 

 Linked to: One Sharendipity Place, Tasty Tuesdays

Friday, July 05, 2013

Five Days of Fairy Food: P is for Pixie Popcorn

Pin It Now!

Recently, my daughter had her very first sleepover, and I wanted to make it as special as possible. With the busyness of life, I couldn't exactly go ALL out or anything, but we made some fun fairy-themed food and watched Disney's Secret of the Wings. For the next 5 days, I will be highlighting several different fairylicious foods!


First up is Pixie Popcorn since I needed a P Post for Ben and Me's Blogging Through the Alphabet. :)


Pixie Popcorn is a spinoff of the Peppermint Bark Popcorn I make at Christmas time. Here's what you need to make Pixie Popcorn:

  • 1/2 cup unpopped popcorn or approx. 16 cups popped corn (I don't measure once it's popped)
  • 2 cups white chocolate chips
  • 1/4 - 1/2 tsp. vanilla
  • a dash of salt
  • Girly colored sprinkles (We used pastel sprinkle balls and hot pink sugar crystals)

*Pop 1/2 cup of corn kernels. Melt white chocolate chips and stir in vanilla. Using your largest bowl, pour popped popcorn and melted chocolate into the bowl and gently stir coating evenly. Add sprinkles for a fairy festive touch. Pour popcorn mix onto waxed paper or foil and let harden. Break off pieces and enjoy!


P is also for Pixie Pancakes! Click here for recipe. :)

 For my first fairy food post, I am participating with :

Blogging Through the Alphabet

Be sure to check back tomorrow for more fairy food fun!

Wednesday, July 03, 2013

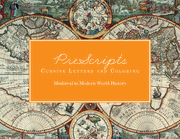
Classical Conversations: PreScripts Cursive Letters and Coloring

Pin It Now!


Logo photo classicalconversationslogo_zps461acbc8.jpg
 
 
Looking for a cursive curriculum? Well, the Schoolhouse Review Crew has been reviewing several cursive books in the Prescripts Series from Classical Conversations. Classical Conversations founded by Leigh Bortins, homeschool mother of four, is built upon three M's:
  1. Mission: "The purpose of education is to know God and to make Him known."
  2. Model: "Combines classical learning and a biblical worldview."
  3. Method: "In CC Communities, parents equip parents."
All of Classical Conversations' programs represent the three stages of classical learning -- grammar, dialect, and rhetoric. Mastery of facts during the early years is of greatest importance which gives students a strong foundation on which to build.


Both of my boys began cursive in second grade without any issues, so I figured my daughter would be ready to start then, too. She wasn't. She's always struggled with writing neatly, and beginning cursive last fall was causing too much frustration for her and me. So, we stopped.
 
I planned to launch cursive again this fall, but we ended up starting a little sooner when I saw Prescripts Cursive Letters and Coloring up for review. It looked like it would gently introduce cursive, so with my daughter's blessing, we signed up!

Overview

This 121-page, spiral-bound book uses finger tracing, pencil tracing, and copying to introduce children to the building blocks of cursive writing and drawing. Tracing and copying build confidence and cultivate fine motor skills while the coloring pages add variety.

Details

The first few pages start out rather simply with children tracing lines, circles, angles, and curves.


After that children begin learning the letters of the alphabet in alphabetical order. Children learn how to write both the uppercase and the lowercase of each letter. For each uppercase letter page, children trace a large letter with their fingers before tracing smaller versions with their pencils. There is room between each letter for children to practice writing that letter on their own.

After each uppercase letter page, children can practice their drawing skills by tracing and coloring the different stages of an illustration. Examples of illustrations include turtle, crab, fish, jellyfish (pictured below), pumpkin, ice cream cone, carrot, vase, etc.

Lowercase letter pages follow the same format as the uppercase letter pages. Following each lowercase letter page is a picture for children to color. Coloring pictures feature a photograph, a piece of artwork, or a public domain image that portrays a significant historical event or person from medieval to modern world history. "Most drawings represent a memory peg image from Classical Conversations® Multimedia Classical Acts & Facts™ History Cards." A few examples include Eastern-Orthodox cupola, Russia; King John Signs the Magna Carta (pictured below); Imperial Crown of Austria; Josef Stalin, Library of Congress; First launch of a Trident missile, etc.


Cost: $11.99
Sample pages (includes the first 19 pages)
 
 
How We Use It
 
My daughter practices cursive 3-4 times a week. Typically, she works on one letter per day which includes both the upper and lowercase letters, drawing practice, and coloring. Before she begins, I show her how to write the letter on our dry erase board, and then I watch her trace the letters with her finger. After that, she completes the rest on her own. Before moving on to the next set of letters, I go over her previous work with her.
 
Opinion
 
I really like the simplicity of the first book in the Prescripts series. Even though my daughter was just a few weeks shy of turning 8 when she started Prescripts Cursive Letters and Coloring, it's been perfect for her. The drawing and coloring in between cursive writing adds interest and breaks up the monotony of writing.
 
She's almost half way through the alphabet, and while neatness is still a struggle, she's enjoying this experience much more than her first one. We are both more relaxed, so I am very thankful for this gentle introduction to cursive. I plan to have her finish this book before moving on to more advanced cursive. If I didn't already have a cursive program, I would definitely order the next book in the series, Prescripts Cursive Words and Drawing.
 
If your child is ready to begin cursive or is struggling with a current program, I highly recommend Prescripts Cursive Letters and Coloring for ages 3-7. For more advanced writers, consider the following books reviewed by other Crew Members:


Photobucket


LinkWithin

Related Posts Plugin for WordPress, Blogger...