Showing posts with label Works For Me Wednesday. Show all posts

Tuesday, April 12, 2016

Simple, All-Natural Remedy for Puppy's Dry Skin

Pin It Now!

(Photos from Pixabay)

Use Olive Oil!

Our family rescued a 9 week old puppy about 3 weeks ago. This, by no means, makes me an expert on puppies, however, I do want to share some tips over the next few weeks (or maybe even months) that have come in real handy for us since our family grew by 4 itty, bitty paws. 


Kylo, our new puppy, is some kind of lab mix, and we don't really know much about his first 9 weeks of life. He came to us with really dry, dull, flaky skin, so my husband did some research on how to help him naturally. He recommended that I try adding olive oil to the puppy's food. (None of our puppy pics really show Kylo's super flaky, dry skin, but, trust me, it was yucky.)

Right away, I began drizzling about a teaspoon of olive oil to Kylo's food 3 times a day. We noticed results almost immediately. His coat started to shine, and day by day, we noticed less flakiness. Three weeks later his fur is silky smooth and flake free! We are continuing to add olive oil to his food at least once a day to help keep his coat shiny and healthy.


Not the best photo since Kylo wouldn't stop moving around, but I wanted to give at least some idea of what his shiny coat looked like. Looks better in real life. :)

Remedy for Our Puppy's Dry Skin:

Recap: Our family added about a tsp of olive oil to puppy's food 3 times a day until dry, flaky skin cleared up. We continue to drizzle about a tsp of olive oil to puppy's food at least once per day. 


I use cold-pressed oil for my family, so that's what I used for my puppy. Private Selection's Spanish flavor was on sale. :)


Kylo at 12 weeks.

If your puppy or dog has dry, flaky skin, try using olive oil. I hope it works for you as well as it worked for me!

Linked to Works for Me Wednesday

Wednesday, December 09, 2015

Entertain Kids with Cinnamon Toast Crunch Movie Maker

Pin It Now!


*Updated - original post 10/20/2010


Cinnamon Toast Crunch isn't a cereal I let my kids eat for breakfast (more for dessert), but they sure had fun with the Cinnamon Toast Crunch Movie Maker!!

I can't believe it's been 5 years since my boys had fun making silly movies with animated Cinnamon Toast Crunch squares. Today, my daughter saw the title of my old post and wanted to know what it was. I clicked on my link and was surprised that it still worked. So, now she's had fun making some silly movies.

I think your kids will have fun making Cinnamon Toast Crunch movies, too. :) They are super simple to make, so even little ones who know how to click can do it. :)

There are also games and videos for your kids to enjoy. Finding good, on-line entertainment works for me!!!


Linked to WFMW, Hip Homeschool Hop

Images are screenshots from the website. (Hopefully I'm not breaking any rules by using them. Just wanted to share the fun!)


Wednesday, December 31, 2014

Super Fun Family Game - The Settlers of Catan

Pin It Now!


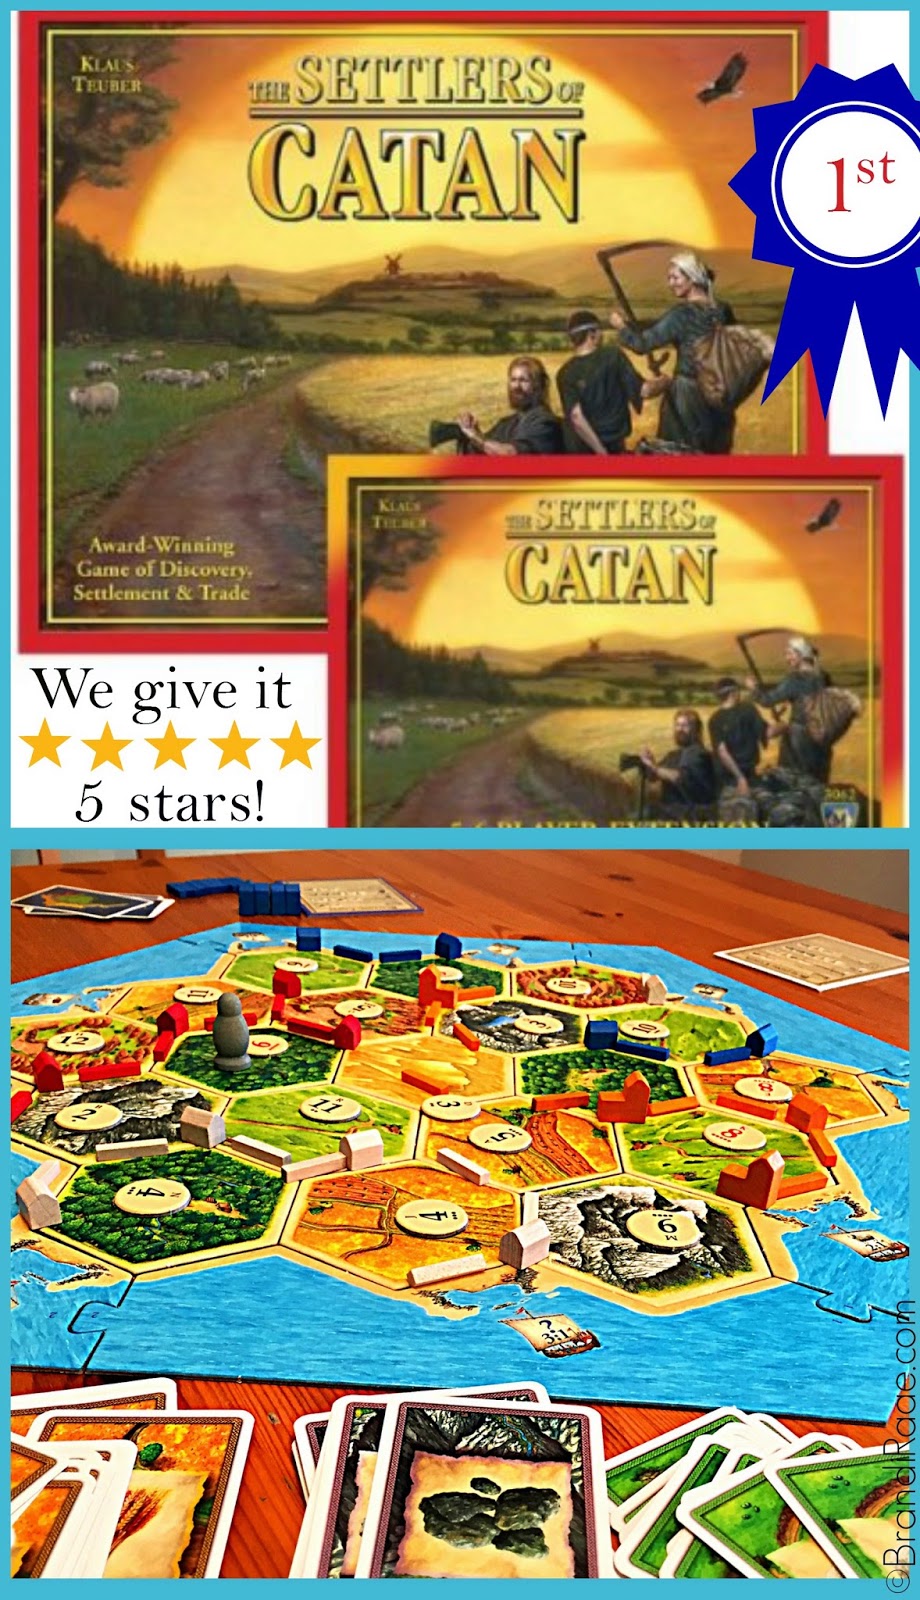
I'm interrupting my relaxing Christmas break to tell you how much I (and my whole family) love the game The Settlers of Catan! I'm extremely surprised by this, too, since I didn't think I would like it that much. I usually go for fast-paced games or games that take about 30 minutes tops. The Settlers of Catan is long - usually takes about an hour to an hour and 30 minutes to play, but it's pretty fun. Even my 9-year-old daughter loves to play. Goodness, we've probably spent over 10 hours playing this game on our break. :)

The Settlers of Catan is only for up to 4 players, but 3 days after Christmas my son had already bought the 5-6 player extension. It's been fun for all 5 of us to be able to play all at the same time.

The gist in a jiffy - you collect resource cards (wool, wheat, ore, brick, and wood) in order to build roads, settlements, cities and buy other development cards. All of these things give you points which you need in order to win the game. Be the first to reach 10 points and you win!

Obviously, a lot more goes into this game. The instruction booklet is quite a few pages long. Not a plus for me, BUT don't lose heart yet . . . There's a handy dandy app you can download on your phone that will walk you through an introduction game. Made everything so easy!!!

If you've been wondering if this would be a good family game to buy, I highly recommend it!!! Probably best for ages at least 8 & up.

Here's a link to a video that explains the game in a nutshell: https://www.youtube.com/watch?v=Kw4tIC_cJiE


  *You can order the original game and extension separately or order both together! Thanks for using my affiliate link. :)


Linked to WFMW, Tuesdays with a Twist

Wednesday, October 22, 2014

Homemade Cider Tip

Pin It Now!


Mmmm, when I make my first batch of Harvest Apple Cider usually toward the end of October, I imagine crispy air and gold & crimson leaves dotting the skies. Trust me, that takes a lot of imagination here in the desert.

Anyway, I still make the cider so my family can feel all comfy, cozy, and fallish.

TIP: To make cider last a little longer, double your cider recipe (or the one above) and store leftover cider in the fridge. I leave the cinnamon sticks and whole cloves in the cider, but I take the tea bags out. Heat up a single serving whenever you feel like it! Make sure to stir the cider before you pour it into a mug, and don't let any whole cloves sneak in. :)

Linked to WFMW

Wednesday, July 23, 2014

Hot Wheel Magnets

Pin It Now!

If you have boys, chances are you've got Hot Wheels. Hot Wheels and boys just go together, don't they? My brother played with them when he was little (and so did I), and my own two boys played with them when they were cute little things.

A few months ago, my daughter needed a couple of cars for a science experiment that involved magnets. Lincoln, one of her older brothers, generously shared what I believe are the last two Hot Wheels left from my boys' childhood. (Um, they sort of demolished their car collection by lining them up in the street in our old neighborhood and waiting for unsuspecting vehicles to run them over. I am not recommending this as a productive childhood activity, just so you know.)

Anyway, doing this project made me think of how fun this would be for little boys. It might be fun for bigger boys to do this with some of their old cars, too. As you probably can already tell, it's a super easy project.

What You'll need:  Hot Wheels or other type of car, heavy duty magnets, and a hot glue gun.


I used a mini hot glue gun sort of like the one pictured above.

As far as magnets go, I used the circle kind that come in a little package at Wal-Mart. The magnets I used work great as long as I don't use the car magnets to hold up any artwork or other paper. If you want functional magnets that serve as a paper-holding device, you may want to check into purchasing the kind of magnets pictured below:


I haven't ever used these kinds of magnets but have heard that they are pretty powerful. I think I remember our science book saying so. ;)

What You'll Do: Turn Hot Wheels upside down and hot glue the magnets of your choice onto the bottoms of the cars. In a few seconds, they're ready to hang on the fridge!

Warning: Probably not a good project to do if you're afraid that your little ones might swallow the magnets. I can't imagine that being a pleasant experience.

Sharing on WFMW, Funtastic Friday

{affiliate links}

Wednesday, April 16, 2014

Mother's Day Gifts for Moms Who Love to Read

Pin It Now!


My kids know that I LOVE to read. In fact, last year my daughter filled out an all about mom page in Sunday School, and guess what she wrote in the what-does-your-mom-do-for-fun blank?

Yes, read.

I'm a real thrill seeker, let me tell ya. ;)

If you have a mom who loves to read, too, consider gifting her with one of these inspirational books!

Moms Who Changed the World by Lindsey O'Connor

I've had this book for years and have read it several times. It's such an encouraging book about what a difference moms really make in the lives of their children. All of the moms portrayed in the book raised kids who made a lasting impact on the world . . . John Ruskin, George Washington, Augustine --just to name a few.

Such a blessing to learn from these dedicated mothers!


A Mother's Legacy by Barbara Rainey and Ashley Rainey Escue

This book is special not only because it celebrates the gift of motherhood but because it was given to me in March 2001 by one of the authors (Ashley) with a sweet note. We were in the same Young Married Sunday School class at the time and I had just announced I was pregnant with baby #2. Ashley wrote that she hoped the Lord blessed my firstborn son with a brother so they could be friends. :) Even though I ended up miscarrying that baby, the Lord did bless me with another pregnancy and a healthy baby BOY in January 2002!

This book will bless you with the memories of legacies, lessons, and love that only a mother can give.


One Thousand Gifts by Ann Voskamp

This book isn't specifically about moms, but it's written by a farm mom with a brood of six children. Ann dares readers to live fully by living each day deeply rooted in gratitude.

I'm only half way through the book and all I can say is, "Wow, just wow." Ann writes in a way that makes you feel like you're actually thinking her thoughts. She makes you want to fully surrender yourself to the Maker of the Universe and embrace everything He gives.

I've been inspired to start my own "one thousand gifts" journal. So far I'm on #50. This book is truly a treasure that I think any mother would love!

*Add a cute bookmark, a fun drink, and a fun snack and you have the perfect gift for moms who love to read!

Linked to WFMW

{affiliate links included}

Tuesday, April 01, 2014

Easy, Delicious Over the Hill Cake

Pin It Now!

Oh, what cake to bake for my hubby's 40th birthday?

I usually make this pie for his birthday, but pie for a 40th birthday celebration? I think not. I knew I didn't want to buy a cake - too expensive, and they usually don't taste very good anyway. I knew I didn't want to slave over fondant - it looks nice but it doesn't taste all that amazing either. I knew I did need to use what I had on hand, so I put my thinking cap on and came up with this cake . . .


If you want to make one, too, here's what you'll need:
  • 9x13 baking dish or cake pan
  • ball cake pan or small, oven safe bowl of some sort
  • 2 boxed cake mixes (or make your own from scratch)
  • 1 package coconut
  • 1/2 - 3/4 package of crushed Chips Ahoy cookies (or something else that resembles dirt)
  • buttercream frosting (follow directions on back of powdered sugar bag)
  • green food coloring
  • Over the Hill sign
  • 4 and 0 candles

Here's what you'll do:

*Advance prep - Tint coconut with green food coloring and mix well until desired shade is reached. Finely crush "dirt" cookies. If you use Chips Ahoy, there will be small chocolate chip chunks. If you don't want that, use graham crackers, maybe? Also, be sure to lather your pans with Crisco and then flour, so the cakes can be removed easily. Before adding cake batter, pour out excess flour after making sure every inch of the pan is covered.

*Prepare both cake mixes. (I used chocolate for the bottom and French vanilla for the "hill.") Bake according to package directions, however, the "hill" will need more time in the oven. After about 30 minutes, check every 5 minutes or so for doneness. I think I baked mine for at least 15-20 minutes longer than normal. Let cakes cool before attempting to remove them from their pans. Tip: Hold a cutting board on top of cake and then turn upside down.

*Set "hill" on top of the rectangle cake. (You can put a little frosting on beforehand to act as glue.) Frost both cakes as one with green frosting. Use a toothpick to draw the size of the dirt road you want. Immediately top with crushed cookie inside the road lines. (I used a small cup to pour some on a little at a time and used my hand to tamp the crumbs down. Messy but not too hard.) After that, add the coconut to the remaining part of the cake. Make sure the frosting hasn't dried yet. If it has, add another layer of frosting. Again, use your hand to make the coconut stick to the frosting.

*Embellish with an Over the Hill sign (I made mine with cardstock and letter stickers) and candles.

It might not be the most professional looking cake, but it's cute, homemade with love, and VERY tasty!!!

If you'd like to use the same soccer ball cake pan that I did, you can purchase it on Amazon.


Linked to Try a New Recipe Tuesday, WFMW, Tasty Tuesdays

{affiliate links included}

Tuesday, March 11, 2014

Quick and Easy St. Patty Snacks

Pin It Now!

Don't have time to come up with some kind of elaborate green-themed spread on St. Patrick's Day but still want to at least acknowledge that the holiday exists? Try these.


You only need:
That's it.

If you're feeling especially snazzy, you can even give them a fun name like Lucky Leprechaun Sandwiches or something. ;)

If you'd like to make naturally dyed green frosting, you can view my St. Patrick Cupcake post. :)

Linked to Try a New Recipe Tuesday and Works for Me Wednesday

Thursday, November 28, 2013

Photo Booth Props ~ Thanksgiving 2013

Pin It Now!


Spice up any family get-together or party with Photo Booth Props!

I had no idea these were all the rage until I began searching for photo props for a girls' tea party. When I saw these Thanksgiving photo booth props, I knew they'd be perfect for having some fun with all the cousins. I also found mustaches, lips, crowns, hats, beards, and more while scouring the internet. I even made a couple of my own on Pic Monkey. :) I can't wait to do this again for Christmas!!

Pre Photo Booth Prop Fun


Thanksgiving at Dad's this year. Desert weather permits all the high-energy children to eat and play outside. I guess that's one plus. :)


Here begins the photo booth prop fun . . .


Even the adults got in on the fun!


Everyone really seemed to enjoy posing with the photo booth props. Try some at your next get-together - they worked for us!

*Bonus*
What's really fun is to animate your photo booth prop photos! My hubby has an app for that. :)

Tuesday, September 17, 2013

Alien Sandwiches

Pin It Now!

Here is a very simple way to make eating sandwiches fun! Make sandwiches into aliens with just a couple of supplies.

Ingredients:
  • Sandwiches
  • Toothpicks
  • Eyes (olives, grapes, grape tomatoes, etc.)
Directions:

First, just make your kids' sandwiches like you normally would, or let them help. Then, let your kids stick 1 or 2 toothpicks into the tops of their sandwiches. Last, add the "eyes." We used green olives and black grapes. This would be a great Halloween lunch. :)

Simple and fun. That worked for me!

*These pics were snapped over 7 years ago. So hard to believe that my alien-sandwich-making days are pretty much over. :( Maybe I could make them for grandkids one day!


Linked to:
Try a New Recipe Tuesday
Works for me Wednesday
Mommy Monday Blog Hop
Tasty Tuesdays

Tuesday, August 20, 2013

W is for Windows: How to Clean Blinds

Pin It Now!

I am sure there is an easier way to do this, but this happens to be the way I have cleaned blinds every year for most of my marriage, and I've been married for 16 years. Wow.

Blind Cleaning Steps Explained

1. I vacuum blinds first to get rid of a lot of the dust that's collected. I vacuum each slat going across horizontally. Vacuuming keeps me from having to constantly wash out the cleaning rag. Plus, I can't stand the smell of wet dust - yuck!

2. After vacuuming blinds, I vacuum the inside of window and window ledge.

3. & 4.To clean the blinds, I wet an old rag and add essential oils to disinfect and to make the house smell wonderful! It takes some time, but I try to wash each slat going across horizontally. (I saw a neat tip the other day - wear an old sock when cleaning blinds. I will have to try that next time!)

5. I dry the blinds, too. I don't want streaks, and this extra step helps to make sure there's not a trace of dust left on the blinds.

6. & 7. Once the blinds are completely clean and dried, I wash and dry the window.

-------------------------------------------------------------------------------------------------------

I clean one window at a time, and I usually spread out this chore over a couple of days. One regular sized window takes me about 10 minutes to clean from start to finish.

I thoroughly clean blinds once a year, but around Christmas time, I clean some of my windows and blinds again, especially the Christmas tree windows!!!

Cleaning blinds is not one of my favorite chores! How often do you clean your blinds, and how do you do it?

Linking to:

Blogging Through the Alphabet


Works for Me Wednesday

Monday, August 05, 2013

U is for Umcka

Pin It Now!

U is for Umcka

 
Photo Credit: Amazon


Umcka Cold Care is one of my go-to cures for colds (congestion, coughs, sore throats, etc.). Our entire family has been using it now for almost 4 years - not that we're sick a lot, but I do try to keep a stash in the medicine cabinet just in case the need for it arises.

Along with other natural remedies I use, Umcka is a must because it is extremely soothing. I can't recommend it enough.
--------------------------------------------------------------------------------------------------


*The following information about Umcka was originally posted on 12/9/09

I am sick of hearing it, but it's true--this is the time of year for the crud! I think it's passed through our home twice now already. :(

I like to treat illnesses naturally if possible.

But, last year on Christmas day, I got the worst cold of my life. My neck glands were so painfully swollen, and my congestion was more terrible than I had ever experienced. I was beyond miserable and wanted to cry and probably did. I had to break down and take NyQuil to get some relief from the symptoms.

Well, a few weeks ago when I felt my body mildly begin to show some of these same symptoms, I rushed to my local grocery store (Fry's), bolted straight to the "natural section" and decided to give something new a try: Umcka Cold Care Soothing Hot Drink!


Just looking at the picture of the steamy mug and lemon wedges made me feel better, so I figured actually drinking it would be even more wonderful. I was NOT disappointed in the least!

It tasted better than any medicinal herbal teas I have tried over the years, and it REALLY did keep my symptoms from escalating.

A little background info
Umcka is a homeopathic remedy made from the roots of a South African plant which is used to treat different respiratory ailments.

Purpose
It is supposed to shorten duration and reduce the severity of what I call, the crud. (Cough, congestion, sore throat, sinus and bronchial infections)

Cost
At Fry's it was almost $10. It comes with 10 packets, and each packet is emptied into mug with 4-6 oz. of hot water. You can drink it 3-4 times a day, so I guess it really isn't too cheap. BUT it worked!!!

I was a little afraid at first, "What if 10 packets aren't enough and I have to buy more?" (Cuz, that wouldn't be very budget friendly right now!) Guess what? I didn't need to. :)

**Umcka Cold Care can be used on kids 6 and up, too. I have already used it on my 2 boys. Worked like a charm every time. :) It was truly amazing for me to watch the symptoms disappear so much faster than usual.

FYI--I also gave my kids grapefruit seed extract throughout their sickness and rubbed lympha rub on swollen glands. But, I really believe it was the Umcka that gave the extra kick we needed to nip it in the bud!!

**Another note--Lincoln always seems get a cough after having a cold. This time was no different. I continued to use the Umcka and rubbed vicks on at night. I never even had to give him anything for the cough, which was a good thing b/c I was completely out of what I use.

UMCKA ROCKS AT MY HOUSE!!!!!!

For more great tips, visit We are THAT Family.

Blogging Through the Alphabet

{affiliate links}


Tuesday, June 25, 2013

O is for Oreo Delight

Pin It Now!


Otherwise known as O.D. in my husband's family. It was requested all of the time for birthday dinners at Pawpaw and Grandma's house in Tennessee.

It is really easy to make. (I had to learn how when we moved away!) I have made a few minor changes because I am super picky about ice-cream brand and I don't like Cool Whip.

Oreo Delight

  • 1 package of Oreos (I sometimes use Late July Vanilla Bean Green Tea cookies that look just like Oreos except taste better!!!!!)
  • 1/2 gallon of vanilla ice-cream (I use Breyers)
  • Home made whipped cream (same amount as a Cool Whip tub) Or you could just use Cool Whip.
*Let ice-cream sit on counter to soften quite a bit. Crush cookies. I like to leave mine kind of chunky. Mix soft ice-cream, cookies, and whipped cream together. Spread into 9x13 glass baking dish. Store in freezer. Let sit for a few minutes before cutting and serving. Garnish with additional cookies if desired. If you do want to garnish, you will need to buy more cookies. :)


**If you want to use the Late July cookies (in organic section of store), buy 2 boxes and use most of them in the O.D. leaving some out for garnishing. Also, to make home made whipped cream, buy heavy whipping cream and beat with an electric mixer until stiff. I add about a tablespoon or so of sugar to a pint.

Linked to Tasty Tuesday
Works for me Wednesday


Visit Ben and Me for more O posts!

Blogging Through the Alphabet
Originally posted June 2010 

Wednesday, June 19, 2013

How to Write on Rocks

Pin It Now! This post is no longer available on Blogger. Please visit my new site to view the post, How to Write on Rocks. Thanks!

Wednesday, June 05, 2013

Free Philippians 4:8 Printable

Pin It Now!


I've had this printable in my closet for a few months thinking the font colors would look great in my entryway room. And of course the message is wonderful as well! I just didn't have a frame to put it in, so when my daughter said she didn't want her baby pictures in her room anymore, I used it.

Perfect - free printable and free frame. Only the frame was too big. Solution: I used the cardboard that came with the frame as a matte. It works.

Click if you'd like to download this lovely printable.

Linked to WFMW

Tuesday, April 09, 2013

Chicken Cheddar Wraps

Pin It Now!
 
 
This is a must spring/summer meal at our house. It's simple yet filling, and it's perfect on a hot, summer day. My hubby often requests this for his birthday or Father's Day dinner, and my oldest requested it for his 10th birthday which was almost 4 years ago. Wow!
 
 
Chicken Cheddar Wraps
 
Ingredients:
  • 1 cup sour cream
  • 1 cup chunky salsa
  • 2 TBS mayo
  • 4 cups cooked, cubed chicken
  • 2 cups shredded cheddar cheese
  • 2 cups shredded lettuce
  • 1 cup guacamole, optional
  • 12 flour tortillas (soft taco size)
  • Tomato wedges and additional guacamole, optional
(Original recipe also calls for 1 cup thinly sliced mushrooms, but I have never included these.)
 
Directions:
 
In a bowl, combine sour cream, salsa, and mayo. Stir in chicken and cheese. Divide lettuce and guacamole between tortillas. Place about 1/2 cup chicken mixture on each tortilla. Fold sides over the filling. Garnish with extra guacamole and tomato, if desired.
 
 I came across this recipe in Taste of Home's Quick Cooking magazine, the May/June 2000 edition. So, I've been making this recipe for a lot of summers!! :)


Wednesday, February 20, 2013

Oatmeal Headband Holder

Pin It Now!


Ever since I saw something similar on Pinterest, I have wanted to make one for my daughter. What a cute way to store headbands!!

Ours is a bit different since I didn't use fabric. I don't sew, so I don't ever have any extra fabric lying around. BUT, I used to scrapbook like nobody's business, so I DO have extra scrapbook paper stuffed in an armoire. :)

What you need for this headband holder:
  • Large, empty, clean oatmeal container
  • Scrapbook paper (we used 3 different colors - I let my daughter choose)
  • Clear tape

Directions:

Cut 4 strips about 4" wide from 2 of the colors. So, you will have 2 strips from each color. (1 strip of paper isn't long enough to wrap around the entire cylinder. Cut 2 strips about 1" wide from the third color. You will use this strip for the middle to cover where the other 2 strips of paper overlap.

Wrap strips of paper around container and tape to secure in place. I know tape isn't very fancy, but as long as it's in the back you can't even see it. Plus, once the container is full of headbands, you definitely don't notice the tape.

I offered to cover the white top with paper then wrap a ribbon around the edge, but my daughter wanted it left alone. Easy for me!

She keeps all of her other hair stuff - bows, ponytail holders, barrettes - inside the oatmeal container.

Most of the headbands fit perfectly. The one on the very top would just slide right down without the other headbands under it. So, I'd say, for the most part, this headband holder works great. Looks cute, too!


Wednesday, February 13, 2013

Pom Pom Erasers for Dry Erase Markers

Pin It Now!
 
 I thought this ideas was absolutely brilliant! I originally saw it on Pinterest, but the link was bad so I can't share it. :(

Anyway, I use a dry erase board every single day for homeschooling, so this is working out great for me. No more using my fingers to erase the date and chores off the board. :) Paper towels will still come in handy for major erasing jobs, but for the little stuff, this is FANTASTIC!

What you do: just hot glue the pom poms to the ends of the dry erase markers. So simple. Took me less than 5 minutes.


Now I just need to get some bigger pom poms for the fat dry erase markers, and I'll be set.

Pom pom erasers work for me!

Linked to WFMW.

Wednesday, January 30, 2013

Bliss From Head to Toe

Pin It Now! This past Christmas my mom said she wanted her daughters to know they were loved from head to toe. So, in my stocking were a Head Massager and Blissful Moisturizing Gel Socks.

Kikkerland Head Massager


I'd never heard of this head massager thing - it kind of looks like a strange type of whisk or something. My sister-in-law told me to just try it and see how amazing it is. Oh my, WOW! Instant tension relief. I love to use it right before I go to bed. So soothing. It feels even better if someone else does it for you. :)

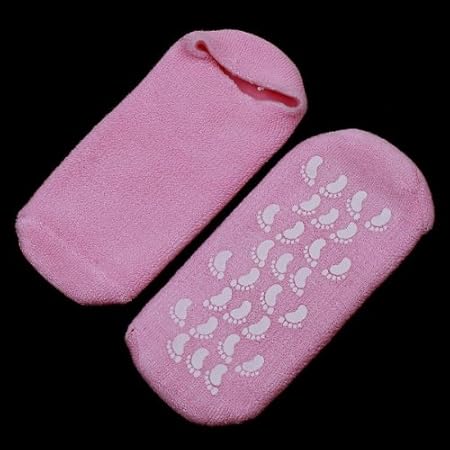
Blissful Moisturizing Gel Socks
 
 
These socks will make your feet feel super soft. In fact, I am wearing them right now as I type. I like to wear them while I read, too. They are best worn while your feet are propped up, and you only wear them for about 20 minutes per day. The self-activating gel contains olive oil, jojoba oil, vitamin E, and lavender oil for softening and soothing.
 
I haven't washed mine yet, so I don't know what they will be like after that. They require hand washing in cold water.
 
 
Pampering with a head massager and moisturizing socks works for me! Makes a great gift giving idea, too. I definitely feel pampered and loved from head to toe. Thanks mom!


Both of these are available on Amazon.


Linked to: Works for Me Wednesday


Image Credit

LinkWithin

Related Posts Plugin for WordPress, Blogger...