Showing posts with label Food. Show all posts

Friday, November 09, 2018

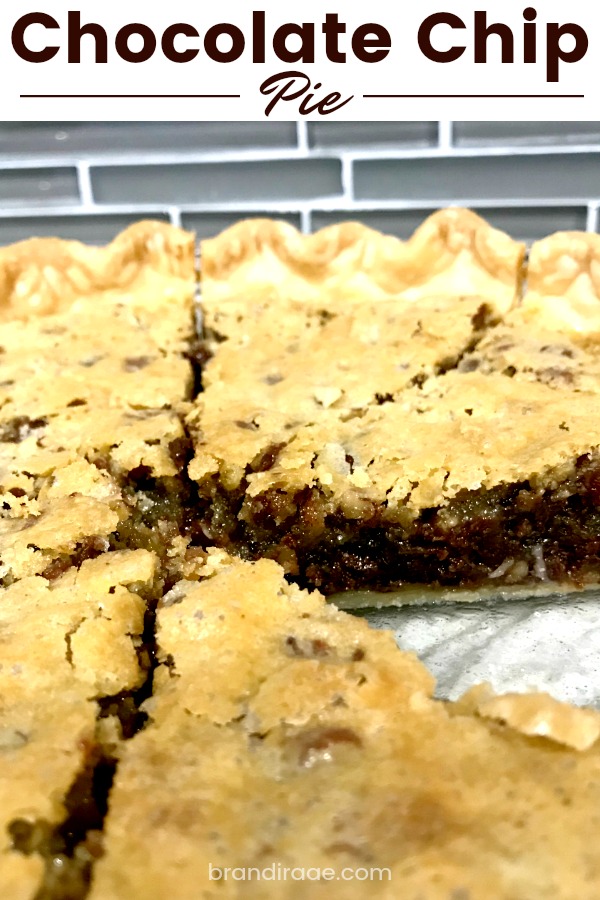
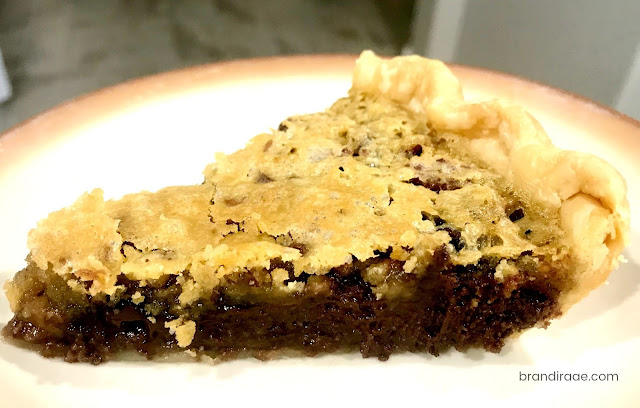
Chocolate Chip Pie

Pin It Now!


This pie is delicious and super simple to make. 

I pulled out my 20-year-old, handwritten Chocolate Chip Pie recipe from a friend the other day. I actually had all of the ingredients in my pantry to make for our church small group gathering. I hadn't made it in a long time, but now I remember how yummy it is!

If you like chocolate chip cookies, I'm guessing you will like this pie. :)

Again, it's SO simple to make.

This post contains affiliate links. I make a small commission for purchases made through these links. Thank you!


Early Black Friday Starts NOW - Up To 60% Off! Shop now!

Ingredients

  • 1 cup white sugar
  • 1 stick softened butter
  • 2 slightly beaten eggs
  • 1/4 cup flour
  • 1 tsp. vanilla
  • 1/2 cup chopped pecans
  • 1 cup semisweet chocolate chips
  • Refrigerated pie crust

Instructions

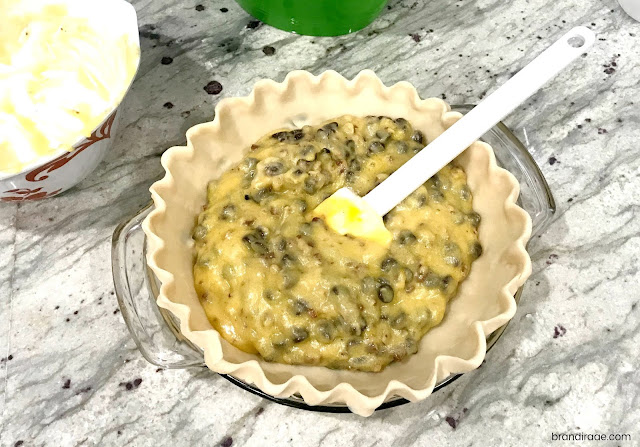
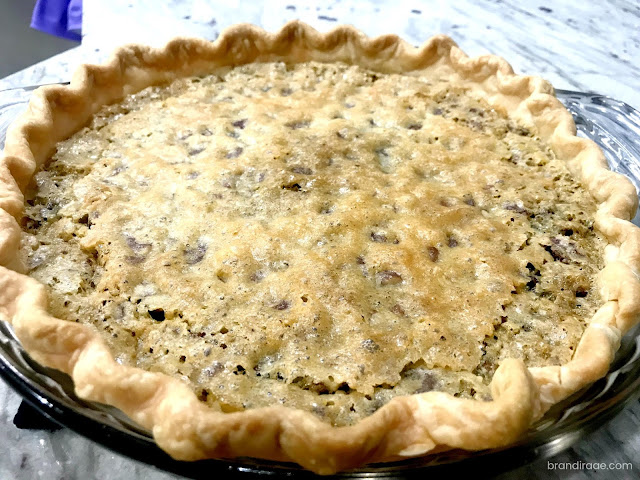
Roll out crust and put in pie pan. I used a glass one. Mix all ingredients together and pour into pie shell. Bake at 325° for 45 minutes to 1 hour. 45 minutes is plenty for my oven. No need to cover edges of pie crust with foil since the pie is baked at a lower temperature.

Top with vanilla ice cream or whipped cream for an extra sweet treat!

Would make a lovely addition to all of those yummy holiday pies. :)


T-fal 2pk Medallion Silicone Oven Mitt - image 2 of 2

Thursday, June 23, 2016

Peach Tips & Recipe Wins {from Pinterest}

Pin It Now!


In May my hubby, my daughter, and I picked peaches at a local farm. Surrounded by the heavenly scent of spring sweetness, we carefully selected about 9 lbs. of beautiful fruit. Knowing that most of my family of 5 wouldn't eat the fruit, I turned to Pinterest and started pinning away. Here's what I've done so far. I only have about a cup of frozen peaches left, so I guess I will have to wait until next peach season to try out all the other recipes I pinned.


Peach Crumb Pie  {Can't Stay Out of the Kitchen}


The one thing I absolutely loved about this pie was that it kept it's shape when cut. The flavor was yummy, too.

I'd change the way I cut my peaches, though. I'd slice bigger pieces instead of cutting into cubes. I'd already cut all my peaches into cubes, so I had no choice when I decided to give this pie a try.

Next time, I'd like to try and make the pie just a tad bit juicer. It's a recipe I'd definitely try again and maybe experiment with different fruits.

Paula Deen's Peach Cobbler  {Stockpiling Moms}


Well, goodness. This cobbler didn't last long at our house. Huge hit. Add a little vanilla ice cream or some whipped cream, and you are all set!

How to Peel Peaches {Queen Bee Coupons}


I was thankful for this tutorial since I'd never peeled peaches this way before. It was pretty quick and easy just like the post said. I did have a couple of peaches that weren't as ripe as the rest, and those were a little harder to peel. Definitely great for when you have lots of peaches!

How to Freeze Peaches {Queen Bee Coupons}


I also followed Queen Bee Coupon's instructions on how to freeze peaches. I freeze fruit all of the time for smoothies, but I usually just throw the fruit in a zip loc freezer bag not caring if some of it clumps together. However, since I wanted to use these peach pieces for recipes, I wanted to freeze them the "right" way. :)

Easy Peach Tea {Passion for Savings}


I love peach flavored drinks. And I love tea. So, when I saw this recipe, I knew I had to try it out. It was really yummy and refreshing. The above picture shows the peach syrup, not the peach tea. Click the above link for pictures of what the tea looks like. I didn't add actual peach slices to my tea, though.

Peach Lemonade Smoothie {Not from Pinterest}

I make smoothies quite a bit, especially now that my older boys don't really like eating fruit all that much anymore. I rarely, if ever, make peach smoothies, so this was a treat!


Since I've been making smoothies for years now, I don't really follow recipes, but here's what I did. I put about 1 frozen banana and about 2 cups frozen peaches in my Ninja blender. Then I added about 1 cup of yogurt. After that, I filled the blender with peach lemonade up to about the #6 line, so I'd have enough for 5 people. It was delicious!

What are your favorite peach recipes?

This post may be linked up to one or more of these link-up parties.

Thursday, June 09, 2016

Corn Cob Banana Pops

Pin It Now!

I was craving my Frozen Chocobanana Bites, but I wanted something a little less messy. When I opened my silverware drawer for silverware, of course, I noticed those little corn cob thingies and, BAM, it hit me! Those would be perfect for making banana pops instead of banana bites. :)

What you'll need:
  • About 3 - 4 large bananas cut into thirds
  • 1 cup of melted semi-sweet chocolate or chocolate of your choice
  • 1 tsp. coconut oil
  • 3/4 - 1 cup unsweetened, shredded coconut (health food section)
  • Chopped walnuts
  • Wax paper
  • Cookie sheet
  • Corn skewers (If you don't have any or you don't have enough, try Popsicle sticks or something like that.)
This recipe could easily be doubled, but when I've made these, I haven't had enough bananas to do so. You also might be able to get your chocolate to stretch a lot further. I usually have some leftover that I end up eating with a spoon. :)


What you'll do:

First. put a piece of wax paper on a cookie sheet. Peel bananas and cut into thirds. Melt chocolate and 1 tsp. of coconut oil in microwave safe container, or melt over stove. Stir in the coconut. With your fingers, dip each banana third into the chocolate coconut mixture and set down on the cookie sheet covered in wax paper. Sprinkle nuts on top if you wish. I didn't say an amount because I only chopped enough to cover some of the bananas since most of my kids prefer theirs nut free. Finally, stick a corn cob thing (actually called corn skewers or corncob holders) in the bottom of each banana.


Now they are ready to freeze. Place the banana pops in the freezer for a couple of hours or until frozen. After the bananas are frozen, I store mine in a zip loc freezer bag. They don't last long, though. I just love how frozen bananas taste like ice cream. :) Serves 9 - 12 (or more if you stretch the chocolate and have more bananas to work with.)

Hope you enjoy these as much as my family does!

This post may be linked to one or more of the following link-up parties.

Monday, April 25, 2016

Easy Crock Pot Italian Meatball Subs

Pin It Now!


Recently, I was inspired by this recipe that I found on Pinterest to make some delicious meatball subs. Only I didn't want to make my own meatballs from scratch. I home make a lot of stuff, but I didn't feel like going to the trouble on this one. Quick and easy is what I wanted, so I used frozen meatballs instead. Super yummy! The whole family liked them, even my son who isn't a big fan of Italian food.

Ingredients:

  • 1 28 oz. can of crushed tomatoes with Italian herbs
  • 2 TBSP minced garlic
  • 1 TBSP olive oil
  • 2 tsp salt
  • 1 tsp black pepper
  • 1 small can of tomato paste
  • 2 packages of Italian style meatballs of your choice (about 52 meatballs altogether).
  • Shredded mozzarella (2-3 cups)
  • Your favorite sub sandwich bread - I used 10 sub rolls from the deli section.


Directions:

Mix together the first 6 ingredients in your crock pot. Add frozen meatballs and stir. (If you'd prefer to make your own meatballs, refer to the link above.) Because of time, I cooked on high for about 5 hours. They turned out fine, but I'd prefer to cook for about 8-10 hours on low next time. 

A little before you are ready to eat dinner, turn your oven on to broil. Cut your sub rolls in half to use the bottom for filling, or only cut about 1/2 way down and keep rolls on their sides. The latter would be easier, but I actually liked eating my sub topless since it cut down on the amount of bread consumption in one sitting. ;) 

Whichever way you chose to cut your bread, spoon about 4-5 meatballs with sauce onto your bread. Sprinkle meatball mixture with mozzarella cheese and broil for about a minute keeping a close eye on the subs. If you cut your bread in half, you will need to put the tops back on (or not) after cheese has melted. Broil for about 1 more minute, again keeping your eye on the subs. The rest of my family ate their subs with the tops on. :)


Oh, so yummy!


Now, this is what happens when you don't keep a close eye on broiling bread. Seriously, this is what one extra minute can do!!! I did much better on the next day's leftovers, though. No burnt bread. :)

I have a feeling we will eat these again! 

Tuesday, April 05, 2016

Chocolate Coconut Freezer Bars

Pin It Now!

My mother-in-law recently sent me this recipe in an email because she knows how much I LOVE coconut and chocolate! These Chocolate Coconut Freezer Bars did not disappoint!!! So easy to make and delicious to eat. :)


What you'll need:

  • 2 cups shredded unsweetened coconut
  • 1/4 cup cold-pressed, unrefined coconut oil
  • 1/4 cup raw honey
  • 1/4 tsp salt
  • 1/2 cup to 3/4 cup chocolate chips

What you'll do:

Warm coconut oil until it becomes a liquid, and then place all ingredients, except chocolate chips, in a blender. Blend on high until smooth. Spread mixture into foil lined 8x8 pan. Freeze for about 15 minutes. While coconut mixture is freezing, melt chocolate chips. Spread melted chocolate over frozen coconut and then put back in the freezer until chocolate has hardened. Turn pan upside down on plate and remove foil. Chop the frozen dessert into pieces and store leftovers in refrigerator or freezer.


Because I used this flaked coconut that I already had on hand, the mixture probably didn't turn out as smooth as it was supposed to be. My Ninja blender struggled to blend this mixture. However, I really liked that it was a bit "chunky." If you don't want chunky, go for the shredded coconut instead. ;)


I didn't have an 8x8 pan, so I used a 9x9 instead but didn't spread the mixture all the way to one side.


I stored the pieces in a zip loc freezer bag and kept them in the freezer.


So delicious. Everyone liked them!

Linked to Try A New Recipe Tuesday, WFMW, Mommy Monday Blog Hop, Tasty Tuesdays

Monday, March 21, 2016

Oreo Delight Ice Cream Muffin Cups

Pin It Now!

I was introduced to Oreo Delight while my husband and I were dating. It was a staple dessert at his grandma's house. When we moved to Arizona 9 1/2 years ago, I knew I needed to start making it myself to keep my hubby and kids happy. :) I've always made it in a 9x13 baking dish, but for a recent BBQ get-together, I decided to serve it a little differently. I thought it might make for an easier serving option. I really like how the Oreo Delight Ice Cream Muffin Cups turned out!!


Oreo Delight Ice Cream Muffin Cups

Ingredients
  • 1 package of Oreos (I sometimes use about a box and a half of Late July Vanilla Bean Green Tea cookies that look just like Oreos except taste better!!!!!)
  • 1/2 gallon (or whatever size it comes in now) of vanilla ice-cream (I use Breyers Natural Vanilla Bean)
  • Home made whipped cream, or you could just use a tub of Cool Whip.

Directions

Let ice-cream sit on counter to soften quite a bit, not totally liquefied, but soft enough to stir into the consistency of a frosty or something like that. Crush 1 package of Oreo cookies while ice cream is softening. I like to leave the cookies kind of chunky, so that there are bite-size pieces. Mix soft ice-cream, cookies, and *home made whipped cream together. 

Instead of spreading into a 9x13 glass baking dish like I instructed in my original Oreo Delight post, spoon mixture into paper lined muffin tins. You should be able to fill about 24. Store in freezer. If you want to garnish each ice cream muffin with an Oreo, you will need to let the ice cream harden enough so that the Oreos can stand up in the middle of the "muffin" without falling over. I think I let the ice cream harden for at least an hour or more. After topping with Oreos. freeze for several more hours - I let mine freeze overnight with a foil tent over each muffin pan. When you are ready to serve, peel the paper off and eat! (Using a spoon is less messy.)


*To make home made whipped cream, buy a pint of heavy whipping cream and beat with an electric mixer until stiff. Before beating, I add about a tablespoon or 2 of sugar to sweeten just a tad.

Enjoy!

Linked to Mommy Monday Blog Hop, Works for Me Wednesday, Funtastic Friday

Monday, October 05, 2015

Muddy Buddies Without Peanut Butter

Pin It Now!

These Mudddy Buddies (or Puppy Chow or whatever you may call it) went incredibly fast at my house! Replacing peanut butter with almond butter worked great. I had to use almond butter so one of my kids wouldn't be left out of this bowl full of crunchy, chocolatey yumminess. :)

See below for the super easy recipe and the kind of peanut free & gluten free almond butter I used to make this delicious treat.


Muddy Buddies Without Peanut Butter

You will need:

  • 9 cups rice cereal squares
  • 1/2 cup smooth and creamy almond butter
  • 1 1/2 cups semi-sweet chocolate chips
  • 2 cups powdered sugar
What you'll do:

Pour rice cereal into large bowl. Melt chocolate chips slowly in heavy sauce pan (what I did) or double boiler over low heat, stirring constantly. Add almond butter and stir until smooth. Remove from heat and pour over rice cereal. Stir with spatula until cereal is evenly coated. Put 1/2 of the mixture into a large zip-top plastic bag and add 1/2 of the powdered sugar. Seal bag, then shake it up until completely coated. Transfer Muddy Buddies to a pretty serving bowl. Repeat process with remaining cereal mixture and powdered sugar. 


Here's the almond butter I used to make the Muddy Buddies. It's made with blanched roasted almonds, organic cane sugar (3 grams per 2 Tbsp), palm fruit oil, and sea salt.


Barney Butter Smooth Almond Butter, 16-Ounce Jars (Pack of 3)

Can't find it at your store? You can order from Amazon and choose between a 16 oz or 10 oz 3-pack:


Hope you enjoy it as much as we did!!

*Affiliate links used in this post.

Linked to Try  A New Recipe Tuesday, Tasty Tuesdays

Wednesday, September 02, 2015

Homemade (Not Too Sweet) Coleslaw

Pin It Now!
Coleslaw is one of my favorite summer side dishes. Even though I will eat it on the sweet side, this recipe is less sweet but just right! In fact, as soon as I post this, I'm going to go make some. :)


What you'll need:
  • 1 bag of shredded coleslaw 
  • 1/4 onion, finely chopped
  • 1/2 cup mayo
  • 1/2 tsp. of salt
  • 1/2 tsp. of favorite seasoning salt (I use a blend of salt, pepper, garlic powder, and turmeric.)
  • 1/4 tsp. black pepper
  • 1/4 tsp. lemon pepper
  • 1 TBS. white sugar
  • 2 1/4 TBS. white vinegar
  • Dash of dry mustard
  • Dash of paprika

What you'll do:

Mix all ingredients thoroughly with a spoon. Dust the top with more pepper and seasonings as you wish. Cover and refrigerate for about 2-3 hours or more. You may or may not need to add more mayo - depends on how creamy you like it.


* I often double this recipe to make sure there are plenty of leftovers!


Linked to WFMW , Try A New Recipe Tuesday, Tasty Tuesdays


Friday, January 09, 2015

Bake Eggs In Muffin Tins ~ It Works!

Pin It Now!


I've been wanting to try this method of cooking eggs for a while, especially since milk isn't cooperating much with one of my kids. So, the ever-so-easy cereal and milk breakfast isn't working. #Sigh#

I'm not going to bother with making this post all Pinterest-y, but I did want to share how easy it is to make eggs this way. Forget frying eggs in the skillet!!!

You can visit this post from Frugality Gal to see where I got the super easy directions.

*Tips
  • Since I don't ever have cooking spray, I used olive oil to grease each muffin tin.
  • I also baked my eggs for 20 minutes instead of 15. I don't like my yolks to be too soft.
  • Right after I pulled the tin out of the oven, I used a regular kitchen knife (not the sharp kind) to go around the edge of each cooked egg, and then I scooped out each egg with a plastic spoon.

I was really nervous about baking eggs this way - I thought I'd probably waste an entire dozen of eggs. But I didn't! I was pleasantly surprised. :) We ate some for lunch, but now my kids can heat the leftover egg muffins for breakfast. Yea!


So perfect and cute. If I ever feel like going the extra mile, I might wrap bacon around them like I've seen in other posts. Today, though, we just had bacon on the side.

I hope yours turn out as well as mine did. Enjoy!

Monday, December 15, 2014

Classic Gingerbread Cookie Cut Outs {Recipe}

Pin It Now!

 
My hubby likes gingerbread men. No frosting. Just classically plain and simple. And they really do have a holidayish feel to them, don't they? I've used a couple of different recipes, but this one is my favorite. The recipe is very easy to make. The dough rolls out well, and cutting out shapes is a snap. Major Christmas baking plus right there! (I can't say these things about my Prize Sugar Cookies, though.)
 
 
Tiny gingerbread men make perfectly festive cupcake toppers, too! We took these yummy creations to our homeschool Christmas party. They were totally adorable until my oldest son said it looked like the gingerbread men had been shot with their guts spilling out all over the place. Boys.
 
 
My daughter crushed red hots for sprinkling the tops of the cupcakes. Gave the vanilla cake and buttercream frosting a little cinnamon zip!
 
 
We've also used these little gingerbread men to adorn gingerbread houses, but we didn't make any this year. Of course, it's always fun to give them frosting faces and cookie decoration buttons. :)
 

Wednesday, October 01, 2014

Easy Crock Pot Sausage and Beans

Pin It Now!

Let the fall crock pot cooking commence! This dish is usually the first fall crock pot meal that I make - probably because it's so easy.


Oh, how I love being able to take the main dish out of the base of my crock pot! Anyway, for the first 15 or so years of marriage I had an old fashioned crock pot that didn't come apart. Not fun to wash at all.

Do you need a new crock pot for fall and winter cooking? If so, check this one out on Amazon. I am definitely enjoying mine. :)


Linked to Works for Me Wednesday, Tasty Tuesdays

Affiliate link included in this post

Tuesday, September 02, 2014

Probiotic Veggie Dip

Pin It Now!


Okay, this dip that I made up on the fly is like the new sensation at our house. It is YUM!!! We are truly eating more raw veggies because of it.

What you'll need:
  • One 17.6 oz. tub of Fage plain Greek yogurt or other plain yogurt full of all the good bacteria. (I choose the kind with all the fat left in because of all the research I've done on how your body can't process calcium without fat.)
  • 1 tsp. salt
  • 1 tsp. garlic salt
  • 1 tsp. garlic powder
  • 2 tsp. dried onion mix (located where all the spices are.)

What you'll do:

Simply mix in all the spices and stir thoroughly. Then go crazy dipping in all kinds of veggies!

************************************************************************


I'm so glad to have a healthy veggie dip alternative that my family loves. :)

Sharing on Try a New Recipe Tuesday, Inspire Us TuesdayWFMW, Tasty Tuesday, A Little Bird Told Me

LinkWithin

Related Posts Plugin for WordPress, Blogger...